

How to Choose Walking Shoes for Australian Lifestyles, From Daily Errands to Weekend Trails
- Written by: Daily Bulletin
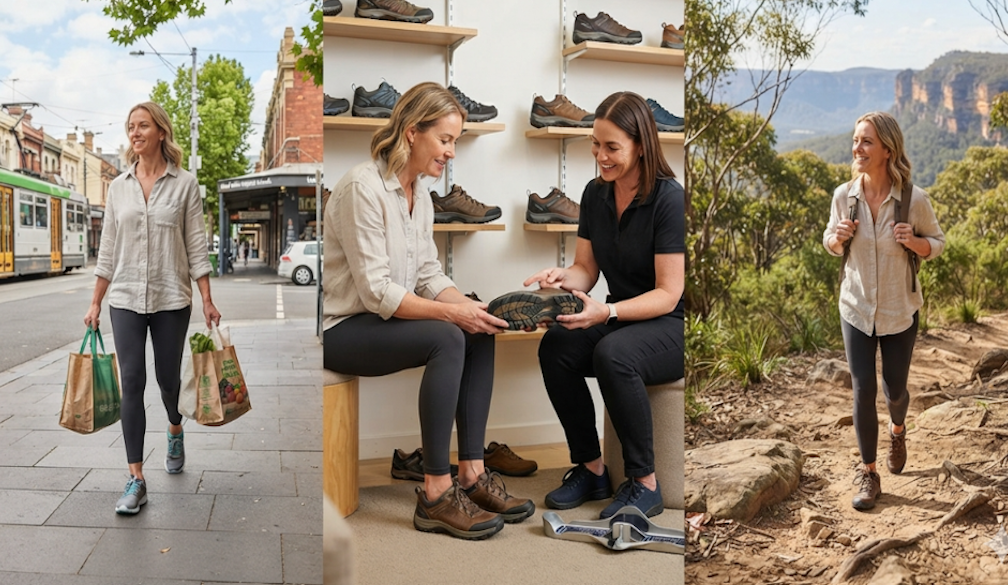
Walking shoes are often bought for one imagined activity. A morning stroll. A weekend trail. The daily trip to work.
Real life is rarely that tidy.
An Australian walking shoe may spend Monday crossing station platforms, Saturday moving through a shopping centre and Sunday following a gravel track near the coast. It faces hot pavements, sudden rain, hard indoor floors and long stretches in the car.
That makes choosing the right pair less about finding the softest shoe in the shop and more about understanding where, when and how it will be worn.
The best walking footwear should feel comfortable during ordinary errands while still offering enough grip and stability for the more active parts of the week. It does not need every technical feature available. It needs the right ones.
Start With the Walking You Actually Do
Before looking at brands, soles or materials, think about a normal week.
Someone who walks mainly through city streets has different needs from a person who regularly follows bush tracks. A commuter may value low weight and breathability. A weekend walker using uneven paths may need stronger grip and a more protective upper.
Many people fall somewhere in between.
They want a shoe suitable for supermarket trips, travel, casual exercise and light outdoor routes. In that case, a balanced walking design is often more useful than either a thin casual trainer or a heavy hiking boot.
Be honest about the most demanding surface the shoes will face. If the “weekend trail” is usually a maintained park path, an aggressive outdoor sole may be unnecessary. If it includes loose stones, steep ground or mud, an everyday urban shoe may not be enough.
Australian Weather Changes What Comfort Means
Australia does not offer one single walking climate.
Hot, dry conditions place different demands on footwear from damp winters or humid coastal weather. A shoe that feels comfortable during a short fitting may become warm and restrictive after an hour outdoors.
Breathable uppers can help release heat, particularly during city walking or warmer months. Mesh and lighter fabrics often feel less enclosed, although they may offer limited protection during rain.
Water-resistant shoes are useful in wetter regions and on outdoor paths. They can also trap more heat. Fully waterproof construction may be unnecessary for someone who mostly walks in dry urban conditions.
There is always some compromise. The practical choice should suit the weather encountered most often rather than the most extreme conditions imaginable.
Fit Should Be Judged by Shape, Not Size Alone
Shoe size mainly describes length. It does not fully explain width, toe shape, internal depth or heel fit.
Two walking shoes carrying the same size label may feel completely different. One may narrow around the toes. Another may feel shallow across the top of the foot. A third may provide plenty of room at the front but allow the heel to slide.
The toes should have space to settle naturally. They should not press against the front or sides during walking. The heel should remain secure without feeling tightly clamped.
Buying a longer shoe to gain more width is not always helpful. Extra length can cause the foot to slide while failing to relieve pressure across the forefoot.
Men comparing recommended walking shoes should consider width and depth alongside the familiar size number. The shoe needs to match the foot, not simply appear correct on the box.
Try Shoes Later in the Day
Feet can become slightly larger after walking, standing or spending time in warm weather.
A pair tried early in the morning may feel tighter by late afternoon. Shopping later in the day can provide a more realistic impression of how the shoes will perform during longer use.
Wear the socks normally used for walking. Thick socks reduce internal room, while very thin socks may make a loose heel feel worse.
Both shoes should be tested. It is common for one foot to be slightly longer or wider than the other.
Walk around properly rather than taking two careful steps. Turn, stop and change pace. Where possible, try a slope or stairs. Pressure at the front, movement around the heel or rubbing across the sides should not be ignored.
Cushioning Needs Stability Behind It
Thick cushioning has become one of the easiest ways to sell walking shoes.
Softness can feel good immediately, especially on hard shop flooring. Yet a shoe that is too soft may become tiring because the foot has to work harder to stay controlled.
A firm, thin sole creates a different problem. Concrete pavements and tiled floors can feel unforgiving after several hours.
The useful middle ground is cushioning that softens repeated steps while keeping the foot stable. The shoe should bend near the forefoot, where the foot naturally flexes, but it should not collapse or twist easily through the middle.
This balance matters on trails as well as pavements. Uneven ground demands enough structure to keep each step controlled.
Comfort should last beyond the first impression.
Grip Must Match the Surface
A smooth sole may be adequate inside a shopping centre and less convincing on a wet footpath.
For mixed Australian use, the outsole should provide dependable traction without feeling heavy or awkward indoors. Look for a clear tread pattern and enough rubber contact with the ground.
Deep lugs are helpful on mud and loose trails but may be unnecessary for daily errands. They can collect stones and feel cumbersome on flat surfaces.
A moderate tread is often a better compromise for men who divide their walking between suburbs, parks and maintained outdoor tracks.
Grip should also be checked as shoes age. Worn tread can reduce traction even when the upper still looks presentable.
Toe Room Becomes More Important on Longer Walks
The front of the foot spreads slightly when it carries body weight. Heat and prolonged movement can make a close fit feel even tighter.
A narrow toe box may begin causing pressure around the little toe, forefoot or nails. Downhill walking can worsen the problem because the foot moves forward inside the shoe.
Enough room at the front allows the toes to move without the entire shoe becoming loose.
This can be especially useful for men with naturally broad feet, swelling or bunions. Additional width should still be combined with a secure heel and midfoot.
A roomy front is not an excuse to wear an oversized shoe. The best fit offers space where needed and control everywhere else.
Weight Matters Over Distance
A heavy shoe may feel solid and protective when first picked up.
After several kilometres, that weight becomes more noticeable. For daily errands, travel and warm-weather walking, a lighter design is usually easier to wear.
Lightweight should not mean flimsy. The heel should retain its shape, the sole should feel controlled and the upper should provide enough protection for the intended route.
Weekend trail users may accept slightly more weight in exchange for grip and durability. City walkers may prefer something closer to a sports shoe.
The question is whether the added weight serves a useful purpose. If it does not, it may simply make the walk harder.
Socks Are Part of the Fit
Walking comfort depends on what sits between the foot and the shoe.
Socks that bunch beneath the toes can create pressure. Thick seams may rub. Damp cotton can hold moisture against the skin during hot walks.
A smooth, well-fitting sock helps reduce friction. Breathable or moisture-managing fabrics may be useful in warmer conditions.
The sock thickness should suit the shoe. A close-fitting pair tested with thin socks may feel cramped once heavier walking socks are added.
For longer trips, carrying a spare pair is a small but useful precaution. Dry socks can make a surprising difference after heat, rain or several hours of walking.
Do Not Save New Shoes for the Trip
New footwear should be tested before a long outing.
Wear the shoes around the house, then during a short errand. Increase the distance gradually. This gives the wearer time to notice heel rubbing, pressure around the toes or instability.
Breaking in should not involve forcing the feet to tolerate pain. Some materials soften with wear, but the basic shape usually remains.
A shoe that is clearly too narrow is unlikely to become wide enough. A heel that slips badly may continue doing so.
Testing also helps determine whether the laces need adjustment and which socks work best.
Know When Walking Shoes Are Not Enough
Versatile walking footwear can handle city streets, park paths and many maintained trails.
It is not suitable for every outdoor route.
Steep, rocky or muddy terrain may require a stronger outsole, more protection and possibly additional ankle coverage. Remote walks also demand greater attention to durability and weather resistance.
Check trail descriptions before deciding that an ordinary walking shoe will be sufficient. A route that looks gentle in photographs may include loose surfaces or difficult sections.
The shoe should match the hardest realistic part of the journey, not merely the easiest.
FAQs About Walking Shoes
Can the same walking shoes be used for errands and light trails?
Yes. A stable shoe with moderate tread, suitable cushioning and a secure fit can work across pavements, parks and maintained trails.
Should walking shoes be bought half a size larger?
Not automatically. Extra length can cause sliding. A better approach is to choose the correct width, depth and toe shape while allowing a small amount of space in front.
Are running shoes suitable for walking?
Some are, although highly cushioned running shoes may feel less stable during slow walking, standing and frequent changes of direction. A dedicated walking design may be more versatile.
How should walking shoes fit at the heel?
The heel should remain secure without feeling squeezed. Repeated lifting or slipping can create friction and affect the walking stride.
When should walking shoes be replaced?
Consider replacement when the tread becomes smooth, cushioning feels compressed, the heel loses structure or the lining begins rubbing. Shoes may wear internally before the upper looks badly damaged.
Choose for the Whole Week
The most useful walking shoe is not the one built for an imaginary perfect walk. It is the pair that suits the places a person actually goes.
For Australian lifestyles, that may mean enough breathability for warm errands, enough cushioning for hard pavements and enough grip for a weekend path. The shoe should feel stable, fit the real shape of the foot and remain comfortable after the first hour.
A well-chosen pair of recommended walking shoes can move easily between daily routines and lighter outdoor plans without forcing the wearer to keep changing footwear.
That versatility is valuable.
Walking becomes easier to maintain when the shoes are ready for both the ordinary day and the occasional longer route.


