

How to Install a Ceiling Storage System in Your Garage
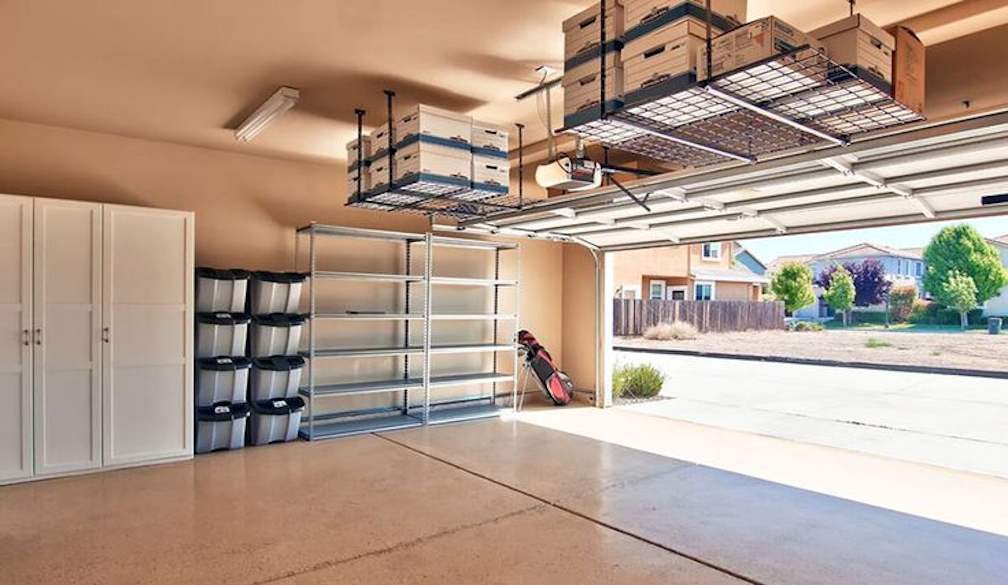
Are you tired of navigating through a cluttered garage? Do you struggle to find space for new tools or equipment? Installing a ceiling storage system might just be the solution you need. Not only does it maximise the use of overhead space, but it also keeps your garage orderly and accessible. In this blog post, we'll guide you step-by-step through the installation process, ensuring that even DIY beginners can confidently tackle this project.
Step 1: Plan Your Space
Before diving into the installation, it’s crucial to plan. Assess the ceiling area of your garage to determine how much space you have available for storage – keep in mind the placement of garage doors, lights, and power tools. You might also want to consider visiting Alpha Garage Doors in Melbourne for professional advice and to check out some storage solutions that can perfectly fit your space.
Step 2: Choose the Right Storage System
Selecting the appropriate system depends on the items you plan to store. For heavier objects, look for systems made of robust materials like steel with a high weight capacity. Modular units can be particularly versatile, allowing for adjustments as your storage needs change.
Step 3: Gather Your Tools and Materials
You’ll need:
- A stud finder
- Tape measure
- Drill and drill bits
- Screws and bolts (make sure they are suitable for your ceiling’s material)
- Level
- Ladder or scaffolding
Step 4: Locate the Ceiling Joists
Using a stud finder, locate and mark the joists in your garage ceiling – these will provide the support for your storage system. Ensuring your system is anchored to the joists is crucial for safety and stability.
Step 5: Assemble the Storage Rack
Follow the manufacturer’s instructions to assemble your storage rack on the ground. It’s easier to put together the frame before hoisting it onto the ceiling.
Step 6: Install Mounting Hardware
Attach the mounting brackets to the joists where you’ve marked. Use a drill to secure the brackets with screws or bolts. A level is vital here to ensure your storage will be perfectly horizontal and stable.
Step 7: Mount the Storage Rack
With the help of an assistant, lift the assembled storage rack to the ceiling and secure it to the brackets. Double-check all connections to ensure they are tight and secure.
Step 8: Test the Installation
Before loading the rack with items, gently test it by applying slight pressure to ensure it is securely installed. If it holds firm, you’re ready to start using your new storage space!
Step 9: Organise Your Items
Strategically place your items on the storage system (heavier items should be placed in the centre to maintain balance). Using containers or bins can help keep smaller items organised and easily accessible.
Ready to get started?
Installing a ceiling storage system might seem daunting at first, but by following these detailed steps, you'll be able to execute this project with confidence, enhancing your garage's functionality and your home's overall organisation. Good luck!


